| |
My experience with some of my owned stuff:
Canon 750D Baader modified.
This camera was replaced, not suiteable for astrophotography 7 not wanted lines see why
Celestron Nexstar 130 SLT:
As a newbie I first started out with the Celestron Nexstar 130 SLT 630mm. From the very start I wanted to do astrophotgraphy and without spending
too much money too see if this hobby suited me. I searched the internet and found this telescope that was a recommended product even for astrophotography and saw what I back then thougt was nice pictures that it could produce with an DSLR camera, not good but ok for a starter.
Unfortunatelly there are some few hoax sites online that recommends this scope for astrophotograhpy even with long exposures, that is simply just not true.
Now a little more then a year later I can defentely say that this purchase was just to throw my money in the lake and my idea about how a picture should look have changed very much. Sure as a starter it can work as there are so much to learn in this hobby and you can get some decent photos of the moon and jupiter, but thats it.
My very first Celestron 130 the mount went dead after 2 weeks and I got it replaced with a new one.
Both of them needed to be colliminated so you will need a lazer colliminator as well, the collimination on this scope seems to be a never ending story
The tripod on this scope is so shaky that it needs to be absolutely no wind or it will shake, can be some improved with a couple of stones on the middle plate. The focuser is wobbely. The 3 star alignment is a good thing, when it works. One time I stood in the night 45 minutes trying to do the star
alignment and after numerous "Failed" I gave up for the night.
There is a small level on the mount but this can not be trusted, the idea is to put the mount in level to get the goto function find the stars, well it worked somewhat fair when I found out how much wrong the bubble should be to get the mount in level and then marked a ring around the bubble.
The tracking is not good, mine could follow an object somewhat exact around 10-15 sec. So trying to do astrophoto with long shots is out of the question as the mount can not be equiped with a guider. When I had it about 2 months and my war with it was a no win, I gave up and purchased my next scope and mount.
If you still likes to give this scope a try you must also know that if you intend to try and take deep sky photos with a camera directly in the tube, you must move the primary mirror up around 40-50 mm in the tube else you can not get the camera in focus, that means you must fix it yourself.
If not this is an option you must use a barlow lens and then the quality drops.
My conclusion on this scope, sure it can be fine as a starter scope and by all means if you just going to observe or take some planet pictures, but be aware that it will still give you problems with different things that I think a newbie should not have to face. It is not intended to use as an astrophotography scope, all of them beautiful pictures on Orion nebula or whatever nebula will not happen with this tube and above all the mount.
The refractors is much easier to handle, and getting an polar alignment will give much better presicion. Sure it is a little more to learn on the mount but much less on the scope and hopefully less problems to face.
I payed around $630 for my Celestron Nexstar 130 SLT, doubling the money on a refractor at a focallength around 700mm and mount which allows autoguiding will make you a much happier owner as you now can both observe and/or learn to take photos.
Sky-Watcher Explorer-190MN Pro:
After talking to my dealer I got recommendation to buy Sky-Watcher 190MN Pro FL=1000mm and NEQ6 Pro mount which I did.
The focuser was wobbly on my scope and the focuers got stuck a couple of times, I had to help it by pulling the focuser. I opened the focuser and found the reason to why it got stuck, the little focuser pin that moves the focuser up and down had made two plus two marks on the focuser tube. I polished the surface with a fine abrasive paper and it has not been stuck since. As I had this problem from start the marks must have been there since I purchased it. Transport damage? Used telescope? From factory? I will never know.
The only way to get the focuser stable was to tighten a very tiny Allen screw, I was forced to tighten it so hard it was in high risk of breaking the threads, Not good at all. Well after that it was not wobbly anymore.
There are 4 tiny bearings as works as wheels, they are rolling on a painted surface, as far as I know metal against paint has never been a good
combination.

The collimination changes a little from time to time and needs to be checked now and then.
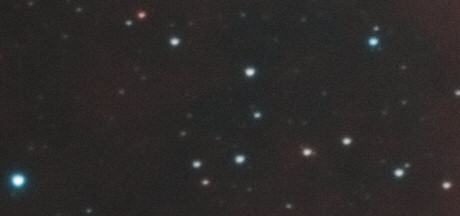
I live in a medium light polluted area as this scope does not like, it gave reflections on my images so I opened it in the front and put flock paper around 2/3 into the scope and in the focuser and bought a dewcap, then the reflections were gone.
Pics before treatment.
 
I had problems with the shape of the stars and after a while I decided to open the tube and see if I could find something wrong.
I could, behind the priamry mirror there were three screws in the mirror holder that was a little too long, around 1-2 mm. This should not have been any problem except for one thing, the screws actually reached the primary mirrors back and two of them made markings in the mirror. This is really a bad job from the company. I had to remove all three screws and shorten them so this would never happen again. After that the star shapes became better.
Too long screws

Screw marks in the primary mirror

It took me 4 times removing the primary mirror and adjusting the rubber pads to get the tube back on track again after that. (I thought)
Also this scope is sensitive with the temperatures and needs to taken outside at least one hour before use, but that does not need to be a problem.
This scope is supposed to be good for the money and give nice round stars on every edge of the picture.... If you are someone else owning it.
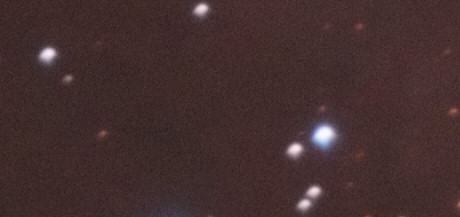
The star shape seems to be a "On what mood am I today?" with my tube. Sometimes they are rather good, while on other they are horrible
On my very last night of season 2019-2020 I finally managed to get the stars rather good. When the season finished, I carried the scope inside gentle like it was a little baby and let it completely alone until next season would start. Season 2020-2021 starts and I carries out the tube on the very same way like it as a little baby. When my first session is at end I can sadly confirm that my Skywatcher MN 190 is one of the tubes that should never have been manufactured.
HERE WE GO AGAIN:
I really dont know if I should laugh or cry anymore. My next try will be on the focuser on the MN190 "sigh"
Okt 2020
Nothing surprises me anymore on how Skywatcher handles "delicate instruments" so I did not expect anything different with the focuser and sadly this assembling was also made by someone who dont care at all. The focuser was around 7 mm wrong in the long holes and when I placed a ruler on the wall of the focuser hole and pointed it down against the secondary mirror, on one side it pointed just outside the mirror.
After correcting this I decided to check upon the tilt angle of the focuser and I used a laser (tested and is in center) that I rotated in the hole to see how much wrong it was. I had to rise the focuser 1 mm in one corner and 0.5 mm under another, after that it seems like it became correct.
It is really very odd that I actually managed to get any prictures att all with Skywatchers crap. Cheap products?
Well not that cheap I payed €1600 for the tube. Is this really what you gets for that amount of money? In my case, Obviously. On my short and painful journey with this hobby, 4 years now, I have learned a couple of brands to avoid. I am sure that others don't agree but after what I have written here, both my verdict on the Skywatcher scope and the mount (see below) speaks for itself, and this experience has not been cheap, at least not for me and further more all the dissapointments and wasted nights it has given me, so many many pictures that I have thrown away because of my equipments constant
failure. Now I am waiting for a clear sky to see if my last adjustments did any difference, sadly I do not have any bigger hopes anymore.
Dec 2020
After three months waiting the weather got better during almost 2 nights, enough for me to test the tube once again. The stars where a little elongated, but far better than above picture, now they where at least oval, did a little more adjusting on the tilt angle on the focuser and after the second night stars were even a little bit better, now a little adjusting with the Morph Transf. tool in Pixinsight and they are fine again, not as good as I want them to be but they are acceptable now at least.
All I can do now is keep my fingers crossed and hope that all is somewhat fixed now.
16 Jan 2021
Well no, not a chance.
The only thing that I can imagen myself at this stage is that there is an issue either with the primary or secondary mirror itself that I can not do anything
about, except buying new mirrors.
Well I have run out of patience and interest to try to find out.
I thought that I covered this issue with the money I already spend on this tube and mount.
Astro-Tech AT-65Q FL=460mm:
The first result of this refractor is very pleasing, round nice stars all over, nice pictures and it is very easy to use. No problems found. This one will bring me much joy.
Nov 2017
Have been taking some pictures with this one now and I am pleased with the results it brings me.
Celestron C9,25-CGE (XLT),OTA 2350mm:
Also I have little to say about this one so far as this is my latest addition.
The mount struggles to keep round stars and I have equiped it with a Meade reducer, but I am in testing mode with this as when the Meade reducer is on the stars are oval and twists themself around the center of the image this is only when the reducer is on.
The collimination was spot on when I first used it so no problem there, impressive. I don't like the aiming scope will maybe replace it later. Will give more info later.
2017-09-27
At first I tested Meades reducer which reduces f.6/3 and the focallength becomes just below 1500mm, the stars is banana shaped the further away from center you gets.
Then I tested Celestrons own reducer that also claims to be a corrector as well as an reducer, well I have the same banana shaped stars with this one as I have with Meades reducer. Using any of this two requires cropping on the images to remove the bad parts, in the center the images will be ok.
After talking to Starizona and have been confirmed that the Starizona SCT Corrector II - 0.63X Reducer/Coma Corrector really does the job I have now ordered one, a little expensive yes, but if it makes my tube function as I like, then it will be a good investment for me.
I did purchase a new finderscope and made a new bracket for it so it became useable for me.

Not to be too hard on this tube is to say that it don't claim to give nice round stars all over the edges, many Schmidt-Cassegrains have this issue.
You can get some good shots planets and on smaller deep sky objects and galaxies where the object do not need the full image and croping can be done on the picture without disturbance. If you truly would like to avoid this problem at this focal lenght then all is left is to look deeper in your purse.
Focal reducers:
I have now tested three reducers from three different companies on my Celestron 9.25. As a reducer they all work well, but when it comes to correcting things get worse. If I dont use a reducer the star shape is fine all over, but this tube is not meant to take deep sky photos without a reducer as the qualtity is not good, it's main use is for planetary and observing. To overcome this you will need a focal reducer.
I have tried several different distance rings combinations to get the correct distance between the reducer and the camera.
Meade f/6.3 Focal Reducer/Field Flattener: Claims to "significantly improving edge-of-field corrections". With this reducer I gets banana shaped stars
on every edge of the picture. Meade says it is to be used with Meade Scmidt-Cassegrains like LT 200. I knows of one who has that tube and has the same problem as I. And I knows of one who has the same tube as I have and gets the same result as I do.
Celestron Reducer/Corrector f/6.3: Celestron claims it works with all Celestron Schmidt-Cassegrain telescopes and that the results are amazing both visually and photographically. Well if you consider oval shaped stars to be amazing then OK.
Starizona SCT Corrector II - 0.63X Reducer/Coma Corrector:
This one is much more expensive then the others and maybe for me the worse thing is that I asked Starizona before purchase if this would solve
my problems with my Celestron Scmidt-Cassegrain 9.25. Got the answer "Yes it would indeed". If you cant trust a dealer to give an honest answer...
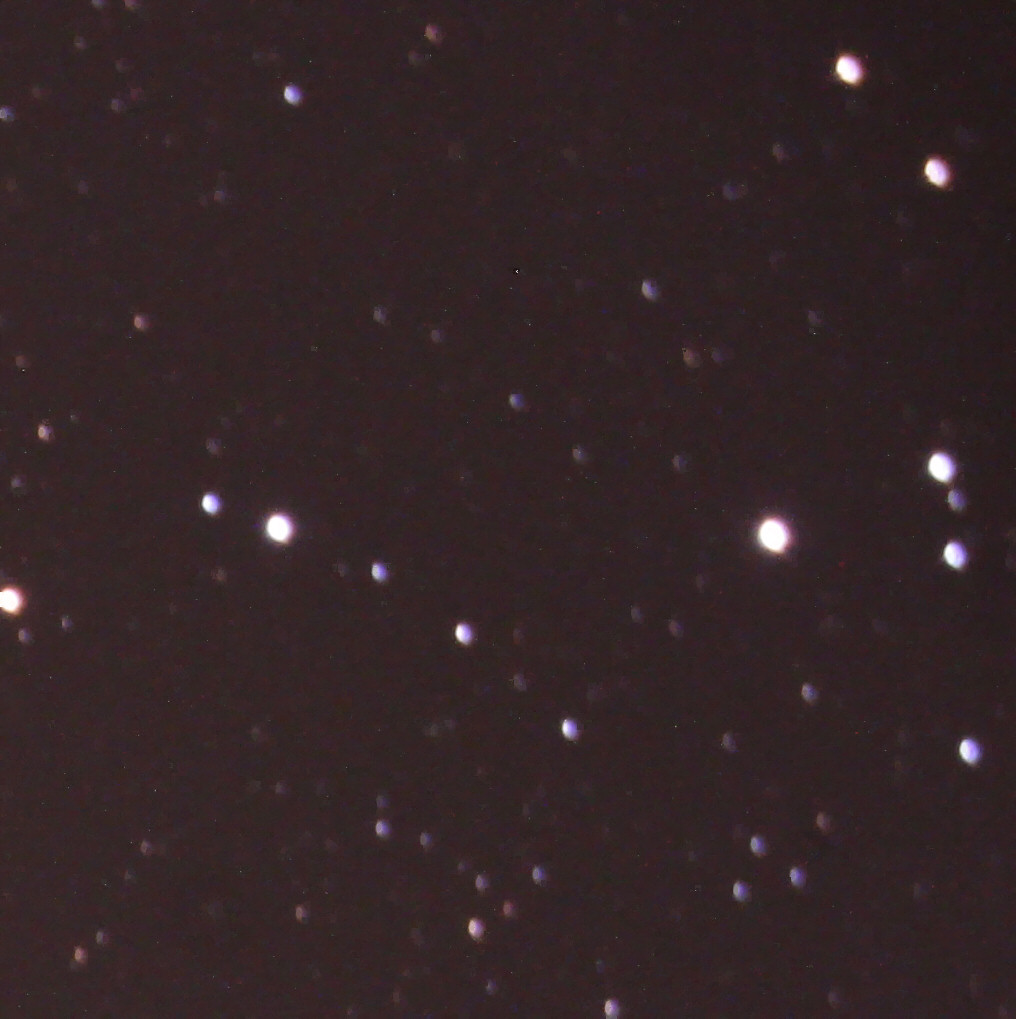
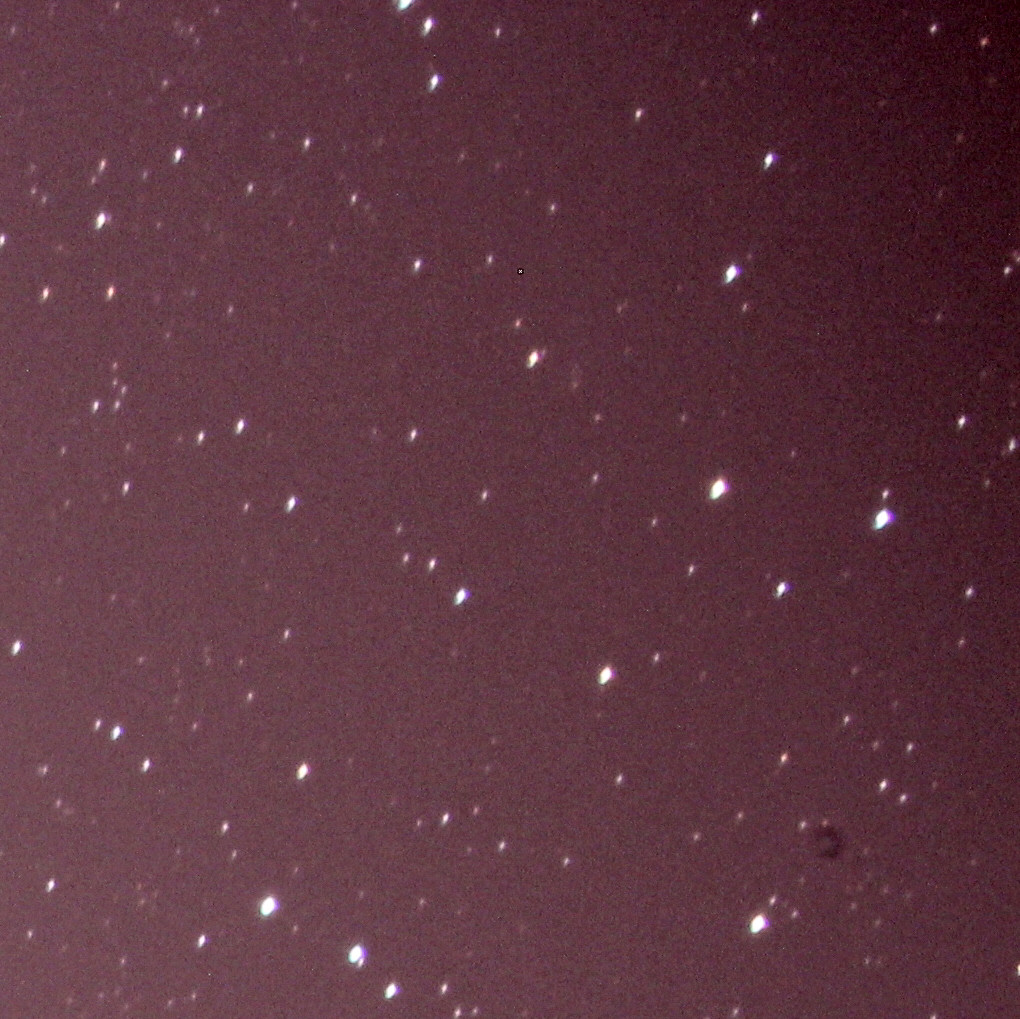
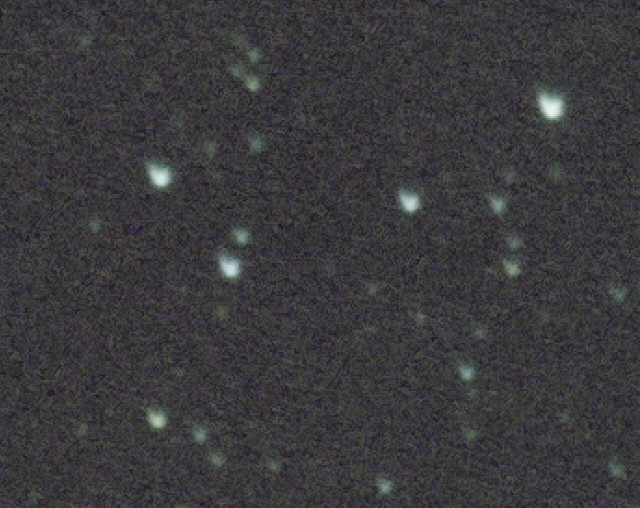
Here is three pictures taken with each reducer. They are all from upper right corner but it is more or less the same in every corner, they all gets better towards center and in center area they are all fine, concerning the star shape. Meade and Celestron twists the stars around center of the image while Starizona makes them longer all pointing towards the center from every edge. Pictures are clickable for larger version.
Meade f/6.3 Focal Reducer/Field Flattener |
Celestron Reducer/Corrector f/6.3 |
SCT Corrector II - 0.63X Reducer/Coma Corrector |
|
|
|
None of them does the job they claims to do on my tube. Starizona reducer also gives a couple of light reflections which must be edited away and
it can also, more closer to center be darker.
They all gives a nice stars in the center of the image. When closing up on the edges problems starts.
Cropping is needed in all cases.
A.t.m. I am actually leaning to Celestrons own reducer as the winner due to it's price and that is the one with least faults in total.
Just to clarify, my Celestron tube is colliminated. Maybe a planecorrector could help just a tiny bit on my equipment, but it is so little wrong that I don't like
to spend that money also and maybe it would not help at all.
Best of the bad : Celestron reducer, but don't forget it will not do the work the way it claims to do on this tube.
Worst of the bad : Starizona, by far, definitely dont works on this tube. This is the exact reply I got from Starizona when I asked if it would work with my Celestron C9,25-CGE (XLT),OTA : "Yes our corrector will truly correct as well as reduce.".......... tragic.
Skywatcher NEQ6 Pro Mount:
Mixed feelings with this one due it's poor construction on some parts and bad assembling on others done by the company.
First I ingreased all the adjustable screws and bolts on the mount. Second I was forced to open the mount in two places. On the side to adjust both RA and DEC cogwheels as they fit loosely, second place was opening the base to rebuild the altitude wedge. I live on the north side of the planet and I beleive this needs also to be done if you live in the southern hemisphere as well, the mount is constructed to be used around the equator (It does not say when buying it).
The Neq6 altitude bolts are M10 and should be enough, but the further away from the equator you gets the more problem you will have. If to far away you are very big risk of bending or breaking the altitude bolts as one of them is needed to be screwed in very far, so far that its angle to the wedge inside gets unacceptable wrong and the bolt must be used with more and more force to move at all. So I opened it and made a new wedge and placed it in such way that the the problem bolt could reach the wedge much earlier and so it was fine and easy to adjust again.
This is how it is done: https://stargazerslounge.com/topic/187034-eq6-latitude-lug-modification-or-how-to-avoid-bent-bolts/
Instead of using a block I did a bracket of 3 mm plate, after a little hammering to make it fit with the same radius as the mount it works likewise good.
There are also a replacement wedge to be purchased if you wish, don't know how good it is though.
I also made a shorter bolt as the original bolt became impossible to adjust as the polarscope cover got in the way

The polarscope, if you use a mirror telescope (MN190) as I do, I have the tripod at it's lowest and when it's time to do the polaralignment I must sit down on the ground and almost break my neck to see through the polarscope. I tried an diagonal eyepiece to the polarscope, but I found it hard to see through (thats for me) after a couple of months with athletics exercises a sore back and from time to time a bad polaralignment I gave all this up and purchased a QHY PoleMaster. In combination with this I found loose screws on the mounts DEC Head, so the head actually was allowed to tilt a little back and forth.

I had never touched them so they must have been loose since I purchased it. My advise is to check all not adjustable screws directly when you gets this mount. I had found more loose screws earlier on.
The cover of the polarscope is made of plastic. It is screwed on metall threads on the mount, this threads is very sharp and is turned in such way that the top of the threads has become a saw and it's cutting away some plastic every time I screwes the cap on or off. One day it was stuck, and not before I gave it a hard blow it came loose, really bad work. The cap I never tightens now as it surely will be stuck again, actually I don't use it any more.
The threads on the mount could easy have been made smooth when making them, but if you dont care you dont.
The little round level, forget it and use this method
Complete mount setup part 1
The DC contact is a problem as the adapters plug has no problem of jumping out of the socket with very little help, I know one who burned up the
circuitboard when this happened, another bad construction.
Mine went out twice without any damage but it's not fun to restart the setup in the middle of everything.
So I made a special holder for this and the problem is gone.

I know one that have soldered the wires directly to the circuitboard to avoid this problem.
The thin wire that holds the plug above broke just were it goes in in the AC house, happened after 6 months and it did not need any help to do this, the plastics are also of bad quality, luckily I did not have a shortcut that burned the AC converter or something else for that matter.
The setup of the mount works very well and seldom fails, with a QHY Polemaster I only needs to use the 1 star alignment. The GoTo is also good, but mine always needs a little adjusments after slewing to the target to get it into the center, to be fair I must point out that I carries the mount in and out for each session, if I had a permanent place this could probably be adjusted so it went somewhat spot on when using GoTo.
For photographing you must have a guide telescope as the build in tracking is no good, around 15-30 secs on my mount then the stars gets oval.
I will replace the cog wheels with belts instead as the cogs can be a little noicy and they can also become loose fiting.
The guiding system don't works as I expected with my 1000mm 190MN, I allmost always seems to get a little oval stars and when I puts on the 2350mm scope it struggles and oval stars are far too easy to get.
All in all as you see there are some work to be done here with the NEQ6 Pro mount, but if you dont like to pay €5 - €10 000 this mount will do a fairly good job after correcting the bad construction details. If you intend to travel then maybe you should look on a lighter version, but of course this also needs to be compared with how heavy scope you will use.
2017-08-10
I have to change my opinion on the Sky-Watcher NEQ6 Pro mount.
A couple of months after I wrote above I decided to put on the belt modification kit from Rowan Engineering. When dismounting the RA shaft
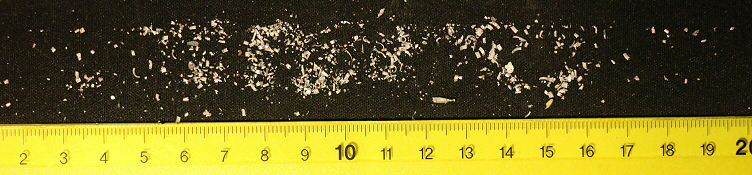
Inluding removing the larger taper thrust bearing "32208", I couldn't beleive my eyes what I saw. After washing the bearing in white spirit this is what
fell out
:

All the white spots you see is metall chips that came out from the bearing when I was washing it. The longest was around 3 mm.
When removing the shaft this was revealed. The metall chips was all a long the shaft and to the above bearings, even between the two upper bearings, this means that the person whom did the job of course saw all the chips and didn't give a shit. If the chips wasnt present between the double bearings I would not say this as the chips could have been hiding in the bottom of the house and could easily been missed, but they where.
Right bearing on the picture I have moved down to be able to clean between the two upper bearings, it's proper position is to the left and left is up on the
mount.
The taper thrust bearings position is just about where the right bearing is now on the picture. Worth to meantion is that the smaller thrust bearing
on the DEC shaft had no metal chips at all. The metal chips itself was not magnetic so I guess they where aluminium casting chips from the milling of the house.

Shaft after cleaning:

After cleaning the Aluminium housing here is a picture of around 1/3 of the metalchips found, here even longer around 5 mm
Impressive huh?
One of this thousands of metall chips in any of the bearings can and most certainly will affect the guiding. Most of the times the guiding
was not good while on others it could work somewhat fine and I had not changed anything. I have now owned this mount a little more then a year and it has been in use for around 80 hours. After seing this I don't recommend any to buy Sky-Watcher NEQ6 Pro mount. Also to meantion is my MN190 comes from the same manufacturer.
Nov 2017:
Been using it a little since this horrible discovery and can say that the cleaining up changed the guiding to be more stable than before.
Well there is no surprise in that but good I found it though. If I had not decied to put the belt modification on, I would spend many nights trying to adjust a guiding system that could not be adjusted and would never understand what the reason was. So many times I adjusted the levels on the mount, bought a QHY polemaster as I thought my poleadjustment was not good enough and adjusted in PHD2, but the RA curve slowly climbed down and down and finally vanished out of view no matter what I did. Well the curve in PHD2 is now wandering up and down through center as it should but it does it just to much.
I still can't get the guiding to be correct, taking 480s shots with the 9.25" is no good, oval stars, max 360s is for me and even then I must throw some of the pics in the bin due oval stars. Maybe a bearing is damaged after all, will it help to replace the bearings with good bearings (SKF).
Oh! and the belt mod from Rowan seems to work like a charm, the manual was great and included tool just fine,
The tweezers could haven been 50 mm longer.
March 2018:
Due this seasons exceptional bad weather I still decided to open the mount once more to replace the 608 bearings on the RA and DEC worm gear shaft
with SKF 608-2RSL.
While doing this I also had purchased a new SKF taper thrust bearing "32208" to replace the one that was filled with metall chips. Good thing I did as when I rotated the old bearing I did not like the sound and the vibrations that i felt from it. I know, I should have done this when I had it open last time but
there was no time for it then.
May 2018:
There were to few clear nights to give a verdict if my changes would have improved the mount, I only had 3 times to test and the first two times the mount stalled due freezing. After that I have placed a heating tape around the mount to avoid this and at this point I also took a step back on how the DEC and RA should be tightened and gave it a little more room to move. So only one night left then and what happened. Throw away all 480 sec pics as usual. Keep most of the 360 pics. I don't know, it seems like I am the unlucky owner of a monday sample. It has ruined so many nights for me, some call this a delicate instrument that should be handled with care! Unfortunately the manufacturer don't seem to agree.
Well I am very unhappy with my Skywatcher NEQ6 Pro. All of this was not what I expected to happen when I bought it. The Skywatchers NEQ6 and MN190 is a constant battle for me and it does not seem to help whatever I do.
May 2021: More info and this is from where I lives in southern Sweden
This mount has a little problems with its "legs" on the tripod, depending on where I starts my session during night it has been to often I must say that the session ends with the MN190, hits one leg and gets stuck. At some point I had this problem every evening upon everyhing else, so I started looking for a prolonger to get my tube higher up and away from the legs. Found one and purchased it, it raised my mount 200mm more from the legs. However as many has complained about it is weak depending on too small screws. The 200 mm of course earned me some more minutes but it was not enough sorry to say the tube still hits the legs. I guess this is a common issue with this type of mount.
Orion StarShoot All-In-One camera:
This camera was disaster, many crashes and the DARK pictures was loaded with hot pixels, thousands of them.
Got my money back and was recommended to try Orion G3 instead
Orion Starshoot G3 Color camera:
This camera is a disaster, crash, crash, crash. It could work for a short while during daytime when testing but when the night came and I tried to take proper pictures, nope.
Have tried latest drivers, reinstalled it many times. Tried it on two different Win 7 PC, even installed a clean XP and tried. crash, crash, crash. have not succeeded in taking 1 proper astropicture with this crap. The picture shows one of very very few pics taken in the night and it is on Vega and a bright, broad, bleeding line in the whole image, there is also a broad line in the bottom of the picture.

Support told me not to take pictures of bright stars as the camera sensor did not like it..... so I guess it must be my fault then. Well yes I bought it.
But this was not what I thought a "cheap" camera for 5-600 € would give me, bad me, thanks Orion for spending my hard earned money.
Just to make all justice, as I said I never succeeded in taking one normal picture with this camera, maybe you actually can?
For now I use a Canon DSLR, actually this camera costs just a little bit more and it can be used to take pictures of the sky and even on bright stars.
Orion Starshoot Autoguider:
I should have known. After being recommended by a dealer to try this I was once again disappointed over Orions products.
Crashed, crashed, worked, crashed, worked. It crashed so hard that it totally locked up my computer and it's keyboard so the only way to close it was to press and hold ON/OFF button on the computer and this means risk in damaging the hard drive on my PC. I finally gave up with Orion from which I will never purchase anything again, also concerning the bad support I got. Instead I bought a Loadstar guider and all the problems were gone with the wind.
Loadstar Starlight express X2 guider:
Easy to use, two thumbs up after tested Orion. One problem came later on though, the USB connection in the back of the camera went a little loose and sometimes it loses the connection, I have used some tape to fix it, and it seems to work now, not optimal of course.
QHY PoleMaster:
This is a really good thing, it makes my day and gives me perfect polar aligment every time I use it.
No sore back and after a few minutes you are good to go. Though the software is only for computers so far as far as I know.
The only negative thing I can say about it is that it comes with the focus set from the manufacturer and should never be touched, this can also be seen on various guides online. Well with my luck this was not true, the only star I could see was the bright Vega and it was a huge faint fat ring in polemasters software, the focus could not have been worse then it was on mine. So you can imagen me trying to find the Polestar...
Luckily there were tools to fix it. Other then that, it's just great, never fails. I had conversation with the support and they were very helpful.
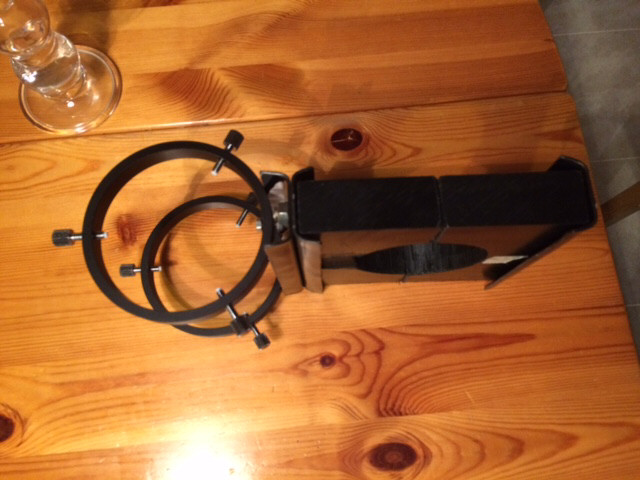
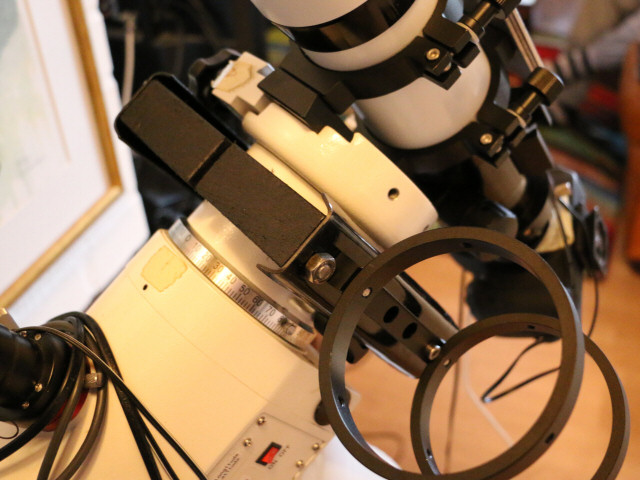
Celestron 80mm Guide scope:
I personally had problems finding focus with this one, but it was maybe not this scopes fault at all as I at the same time been having problems with the USB-Connection in Loadstar guidecamera.
TS-Optics 80 mm Guide Scope:
The TSL80D, Nice round stars, the focus thing followed to this one as well, but it seemed to have been in the camera, there still is problems with the camera since the USB connection went wobbly.
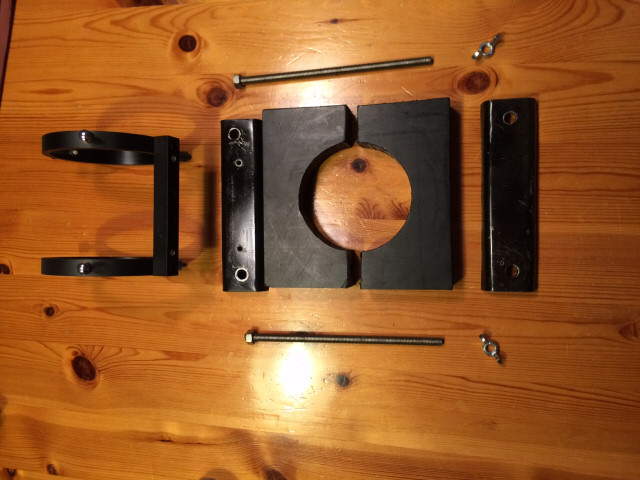
To this guider I buildt a holder to move the scope away from the top and avoid changing it around every time I changes telescope.
Now it is always more or less correct whatever scope I uses, very little adjustments needed, mostly not if I avoided hitting the door carrying it out or in.
The draw back is that the DEC head lock handle is a little hard to reach, but it works. All in all I am happy with it and it is now always on the mount.
Dew heater bands/controllers and shields
2021-02-20 So a little word on this section as well and of course with my own experience only. This two different dew stoppers + controller are very much needed where I live as there becomes rather much moist during the nights.
I own three different dew heater bands and they have all been working just fine and still does ever since I bought them, I actually can't give a good word to the manufaturer as they are not branded.
My first controller was a two channel controller, Hitec Astro Mini Dew Controller, this chap lasted around 1 year then it stoped working, no idea why, the glass fuse is intact.
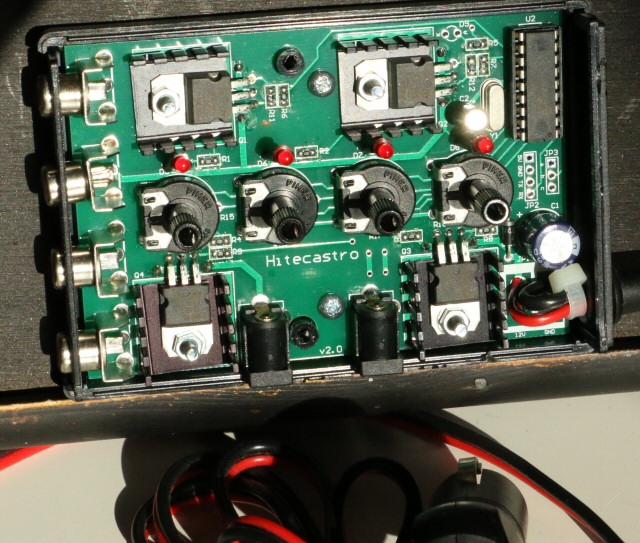
Then I bought my second controller,
Hitec Astro 4-channel Dew Controller, this worked fine for say 1 year then channel 4 stoped working, I have max 3 heaters connected so it was ok, but I was of course worried if one goes. After around 2 years, one night it would not start, so I took it inside and looked at the fuse, hmm that was intact, connected it to 12V just for a test then it worked again, okey but why? Quickly took it outside again and connected all and that nights session was saved. It did work fine until last weekend when it was dead again just when I was about to start the session, carried it inside for a check, now the glass fuse was broken and I got no spare, nothing to do but abort that evenings session and carry all equipment inside again without one picture taken (Where have I experienced this before? Ohhh yes! just right here in my own backyard). Next day I opened the controller to see if something was burned, I am no expert at electronics but I do understand that this lose piece of metal rolling around in the box was not supposed to be there.
Just my pure luck, I don't know, someone must really hate me. The little pin made it malfunction the first and second time and when I moved the controller around, the pin must have changed its position inside and the controller was working again, now this weekend the little pin created a short cut that burned the fuse. I ordered some new fuses and now the controller works again so it did not at least burn up, channel 4 as is still dead. The little pin I can see no place where it fits so it could not have came lose from somewhere inside, it has hopefully been placed there by mistake as it does not belong in my box. To be continued below.
Lose metal pin lying in the box:
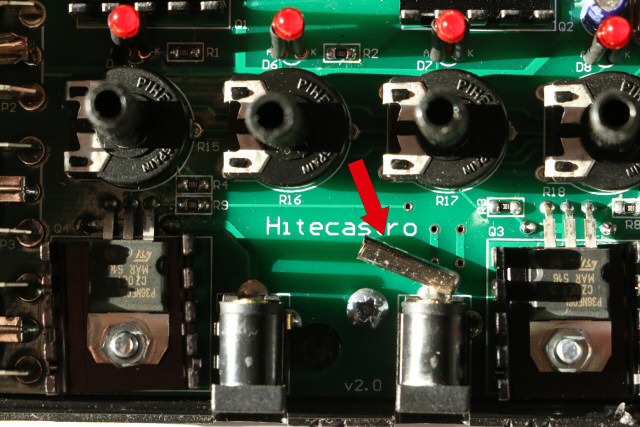
Pin removed:
My first Dew shield was a Kendrick Std Dew shield - fits 8 inch SCT (ca. 235mm), I think it is sturdy, It still is in same conditon as it was when I bought 2016.
Then I bought one dew shield with a build in heater band for my little Astrotech telescope, Kendrick ZapCap - 95-110mm.
The heater stoped working after 5-7 sessions and that was a little over a year from purchase. During my last problems with the Hitec Astro 4-channel Dew Controller, I now started to wonder from where that little pin could have come from. Yesterday I checked the pin in the RCA plug, surprise, there was no pin, well I know now where the pin was, inside the controller, so I got two flies in one hit, dew heater stoped working, a couple of years later it was the controllers turn. I have now done a quick test with a test cable on the heater and it works, all this problems for one little pin.
My last Dew shield purchase was a Astrozap 10” I was about to buy a dew shield for the 9" tube but my local dealer only got this one in stock and said that it probably should fit, if it did not I could adjust it myself if I was interested. I needed one so I bought it.
I had to modify the size and do some carving to make it fit the tube, after this it actually started riping up a lttle , but to be honest this was probably my own fault.
| |